- Free First Class Delivery
- Buyer Protection
- Secure Online Shopping
- Healthcare Professional? Click here
Ankle joint sprains


Categories
What is a sprain (distortion)?
A sprain is defined as a violent wrench or twist of the ligaments which causes pain and swelling of a joint. A sprain is not a dislocation. They are one of the most common sports injuries.
Usually, treatment of sprains is straight forward. The pain usually subsides by itself. The injured area often becomes bruised and swollen. A sprain commonly happens to ankle, foot, wrist, thumb, knee, leg or back joints.
However, in some cases, ligament, capsule or muscle injuries caused by sprains can lead to chronic joint instability. To avoid this, you should consider the following actions.
Chronic joint instability
Chronic instability is usually characterised by a recurring giving way of the side of the joint, such as the outer ankle joint. This condition often develops after repeated sprains of the joint. This can lead to chronic ligament instabilities and severe wear and tear of the cartilage in the joint, leading to arthritis.
Causes – how do sprains develop?
In sprains, the natural range of motion of a joint is exceeded due to external forces. This excessive movement within a joint, usually triggered by a sudden jolt, can cause injuries to the ligament supporting that joint.
Symptoms and signs – how to recognise sprains?
These are common signs of a sprained joint:
- Sharp Pain initially and on-going pain
- Joint swelling
- Bruising
- Limited range of movement at the joint
If you experience these signs, you should consult your GP to rule out more serious injuries such as torn ligaments or broken bones.
Risk factors for sprains
Some people have naturally weak ligaments and tend to get sprains more often. People with high foot arches (hollow foot), delayed muscle reaction time or muscle weakness are also more prone.
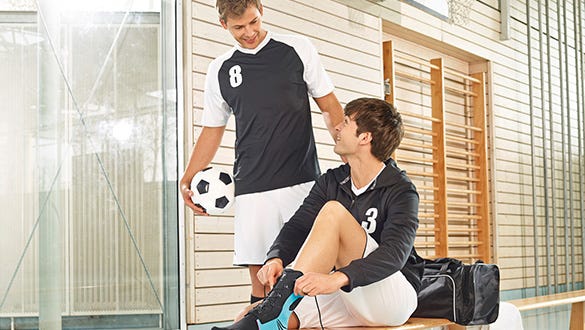
Sprains can happen quickly, especially during sports and exercise such as playing basketball, jogging on uneven ground or playing football. Thumb and finger joints, for example, can be jammed when playing hockey, netball, volleyball or skiing.
Another classic is the sprained toe: when you catch your toe on a piece of furniture or a half-opened door.



Prevention of sports injuries
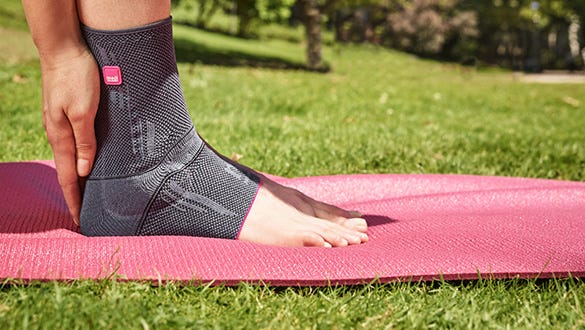
If your ankle joint is particularly unstable (e.g., due to a previous injury or a loose ligamentous apparatus), sprains due to twisting may occur more easily. This is when it makes sense to wear a soft support (e.g. from the range of medi Levamed ankle supports).
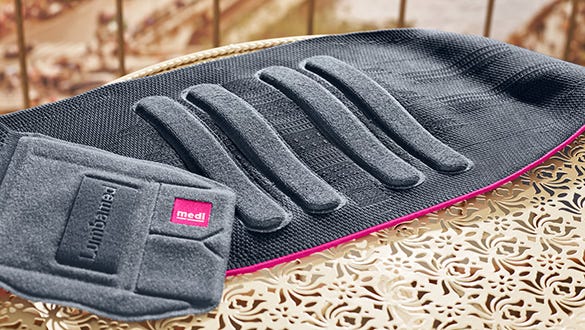
In case of wrist problems, products from the medi Manumed range can be used as support.
Another tip: Always make sure that your footwear is sturdy and suitable for its purpose. This applies to sports and leisure activities as well as day-to-day life.
Products from medi
Sprains - what to do? Therapy according to the RICE rule
If the ankle joint or any other part of the body is sprained, the RICE rule is a good guide for initial treatment:
R = Rest
I = Ice (cooling)
C = Compression
E = Elevation
Rest: When a sprain occurs, you should stop your physical activity immediately. The affected part of the body should be immobilised and no longer be put under strain.
Ice: Start cooling the affected joint immediately. This can prevent the joint from swelling excessively. In addition, cooling generally contributes to acute pain relief.
Compression: An elastic bandage wrapped around the joint with slight tension can offer the necessary compression to the injured area. During the acute phase, it is best to combine the pressure dressing with an ice-pack, and later with a pain-relieving cream/ointment. Your doctor or physio may recommend a compressive soft support to support the joint through the healing process.
Elevation: The last step is to elevate the affected limbs. This also helps reduce the swelling.
Important note
- Unless otherwise recommended by your doctor or physio, below are some recommended strengthening exercises for the joints but be sure to listen to your body and exercise with care and don’t overdo it.
- If discomforts occur during or after an exercise, please stop the exercise and consult your doctor or physiotherapist.
- Take your time and perform the exercises carefully.
- Depending on the healing phase, you can perform the exercises with or without a soft support.
We recommend that you discuss this therapy plan with your doctor or physio.
Exercise for coordination
Forward lunge
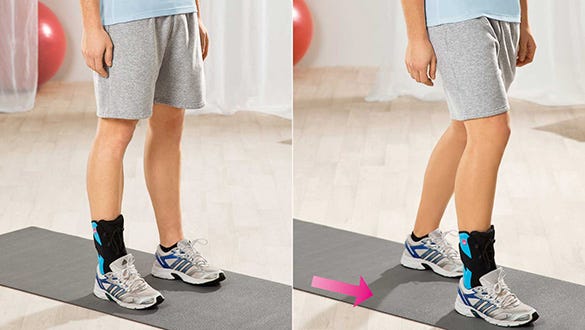

Starting position:
- Legs shoulder width apart
- Keep your back straight
Exercise:
- Take a small lunge step forward with the affected leg
- Keep centre of gravity in the centre of the body
- Then return to the starting position
- Pay attention to a straight leg axis
Frequency:
- 3 sets x 15 repetitions
Side lunge
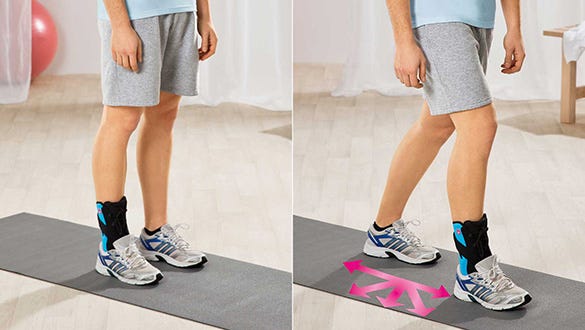

Starting position:
- Legs shoulder width apart
- Build up basic body tension
Exercise:
- Use the affected leg to perform a medium lunge in the given directions
- Always assume the starting position in between
- Pay attention to a straight leg axis
Frequency:
- 3 repetitions
Note: Only do this exercise if you can perform the “Forward lunge” exercise without any problems.
Knee raise
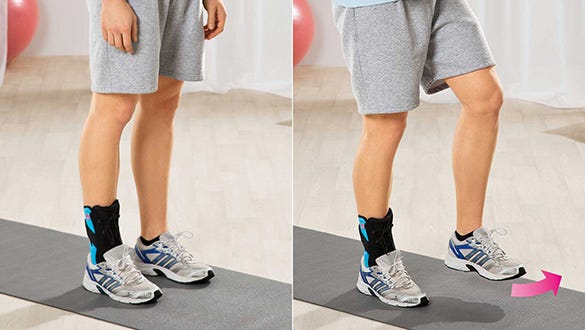

Starting position:
- Open legs shoulder wide and bend slightly
Exercise:
- Lift the unaffected leg from the ground and hold it briefly
- Stabilising movement only from the knee and ankle joint
- Pay attention to a straight leg axis
- Keep upper body steady
Frequency:
- 3 repetitions, each lasting 20 seconds
Knee raise with aids
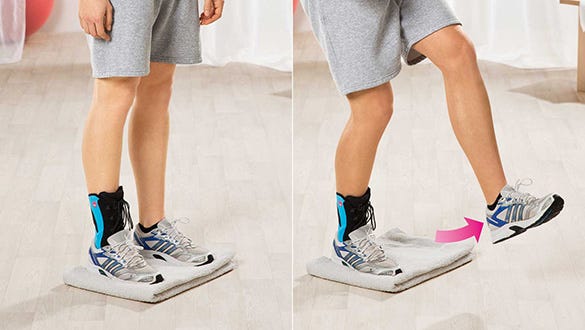

Equipment:
- Airex® Pad / alternatively: folded towel
Starting position:
- Open legs shoulder wide and bend slightly
Exercise:
- Raise the unaffected leg from the ground
- Stabilising movement only from the knee and ankle joint
- Pay attention to a straight leg axis and keep upper body steady
Frequency:
- 3 repetitions, each lasting 20 seconds
- Note: Only do this exercise if you can perform the “Knee raise” exercise without any problems.
Jump
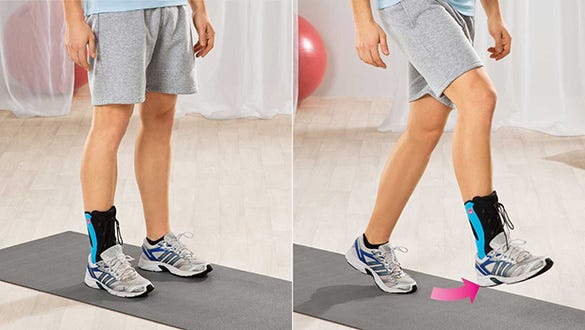

Starting position:
- Legs shoulder width apart
- Keep your back straight
Exercise:
- Make a small jump forward with the affected leg
- Land on one leg
- Stabilise the landing position and hold it briefly
- Pay attention to a straight leg axis
Frequency:
- 10 repetitions
Note: Only do this exercise if you can perform the “Knee raise with aids” exercise without any problems.
Strengthening exercises
Pulling your toes upwards
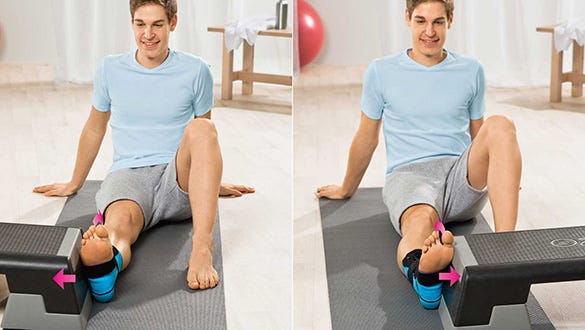

Starting position:
- Put your hands behind your back as support
- Stretch out the affected leg
- Bend the unaffected leg
Exercise:
- Pulling your toes upwards
- Press the outside of the foot statically against a fixed object (e.g. against a wall or a door frame)
- Change: Press the inside of the foot against a fixed object
Frequency:
- 3 sets x 10 repetitions per side
- Hold the position for 2-3 seconds
Pulling your toes upwards with aid
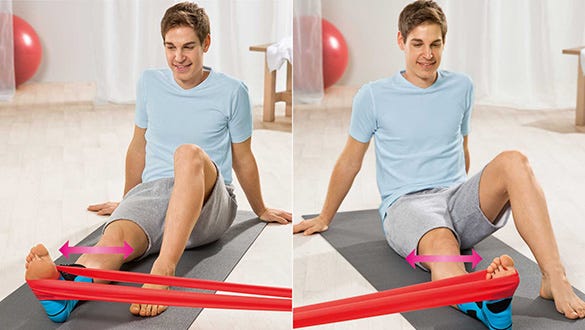

Equipment:
- Thera Band®
Starting position:
- Put your hands behind your back as support
- Stretch out the affected leg
- Bend the unaffected leg
Exercise:
- Pulling your toes upwards
- Put Thera Band® around the ball of your foot and keep tension
- Turn ankle joint outwards
- Then take up the initial situation
- Change: Turn ankle joint inwards
Frequency:
- 3 sets x 15 repetitions
Note: Only do this exercise if you can perform the “Pulling your toes upwards” exercise without any problems.
Heel raise (sitting)
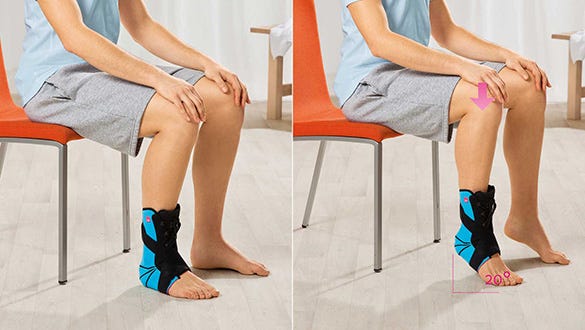

Starting position:
- Sitting upright on the chair
- Do not lean back on the chair
- Place both feet on the ground
Exercise:
- Apply light pressure to knees with the ball of your hand
- Lift heels off the ground (max. 20 degrees)
- Then take up the initial position
Frequency:
- 3 sets x 15 repetitions
- Hold the position for 1-2 seconds
Heel raise (standing)


Starting position:
- Legs shoulder width apart
- Keep the pelvic and torso axis stable
- Place the ball of your foot on a stepper or alternatively on a stair step
Exercise:
- Lifting and lowering the body using the ankle joint
Frequency:
- 3 sets x 15 repetitions
Note: Only do this exercise if you can perform the “Heel raise (sitting)” exercise without any problems.
- To make it easier, you can also do this exercise on a flat surface.
- It is recommended to hold on to the wall or stair railings to help keep your balance.
Exercises for mobilisation
Roll on the exercise ball
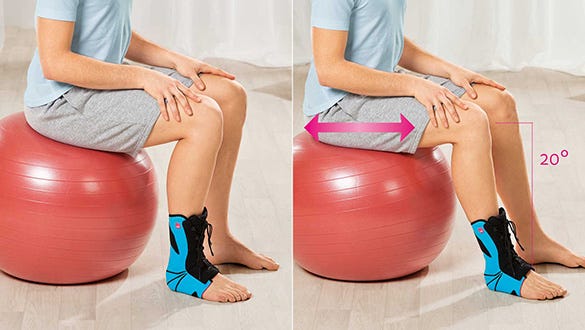

Equipment:
- Exercise ball
Starting position:
- Sit up straight on the exercise ball
- Place both feet on the ground
- Keep your back straight
- Place hands flat on the knees
Exercise:
- Sitting on the exercise ball, roll forward and back slowly (max. 20 degrees)
Frequency:
- 3 sets x 15 repetitions
Pressure exercise
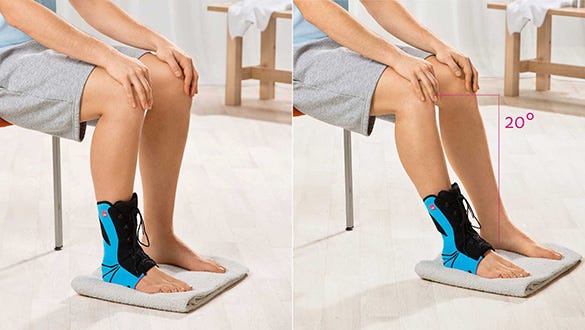

Starting position:
- Sitting upright on the chair
- Do not lean back on the chair
- Place both feet on the ground
- Put a towel under your feet
Exercise:
- Slowly push the towel back and forth with your feet (max. 20 degrees)
Frequency:
- 3 sets x 15 repetitions
medi products for sprains
The rigid half shells of the ankle brace M.step* provide excellent stabilisation during pronation and supination movements (turning of the foot).
The modular design of the Levamed stabili-tri** supports functional treatment and can be adapted to the particular phase of healing (stage-adapted) for safe and reliable treatment and mobilisation of the patient. The joint is stabilised and relieved by the interaction between the compressive knitted fabric, inelastic stabilising element and additional strap.


